Introduction:
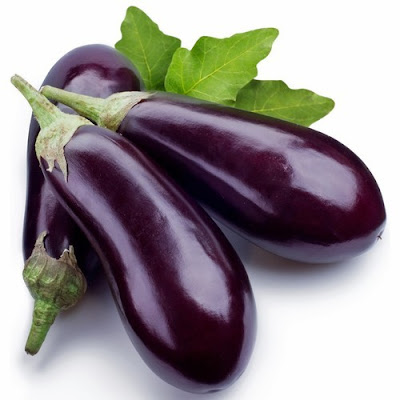
Brinjal, also known as eggplant or aubergine, is a versatile and nutritious vegetable that is a staple in many cuisines around the world. Growing brinjal in a home garden is not only rewarding but also relatively easy with the right care and conditions. Whether you are a seasoned gardener or a beginner, cultivating brinjal can provide a consistent supply of fresh produce for your kitchen. Here’s a comprehensive guide on how to grow brinjal in your home garden.
1. Choosing the Right Variety:
There are numerous varieties of brinjal available, differing in size, color, and shape. Some common types include:
-
Long purple brinjals
-
Round green brinjals
-
Small white or lavender brinjals
-
Thornless varieties
When selecting a variety, consider the climate in your region and the space available. Compact or dwarf varieties are ideal for container gardening or small balconies.
2. Soil Preparation:
Brinjal grows best in well-draining, fertile soil rich in organic matter. The ideal pH level for brinjal cultivation is between 5.5 and 7.0. Before planting, prepare the soil by:
-
Loosening it with a spade or fork
-
Mixing in well-rotted compost or organic manure
-
Adding a handful of wood ash or lime if the soil is too acidic
Good soil preparation ensures healthy root development and improves plant productivity.
3. Starting from Seeds:
You can grow brinjal from seeds or purchase seedlings from a nursery. If starting from seeds:
-
Sow seeds indoors in seed trays or small pots about 8-10 weeks before the last expected frost.
-
Plant seeds about ¼ inch deep in a seed-starting mix.
-
Keep the soil moist and place the container in a warm, sunny spot.
-
Germination usually takes 7–14 days.
Once the seedlings develop 2-3 true leaves and are around 6–8 inches tall, they can be transplanted into the garden or larger containers.
4. Transplanting and Spacing:
Transplant the seedlings outdoors when the weather is warm and night temperatures stay above 15°C (59°F). Space the plants about 18–24 inches apart in rows that are 2–3 feet apart. This spacing allows good air circulation, which helps prevent fungal diseases.
5. Sunlight and Watering:
Brinjal plants need full sunlight—at least 6–8 hours of direct sun daily. Water the plants regularly, keeping the soil consistently moist but not waterlogged. Overwatering can lead to root rot, while underwatering can stress the plant and reduce yield.
Mulching with straw, dry leaves, or grass clippings helps retain soil moisture and suppress weeds.
6. Fertilizing'
Brinjal is a heavy feeder and benefits from regular feeding:
-
Apply a balanced fertilizer (e.g., 10-10-10 NPK) once every 2–3 weeks.
-
Use compost tea or diluted liquid seaweed extract for organic feeding.
-
Avoid excess nitrogen, which can promote foliage growth at the expense of fruit development.
7. Pest and Disease Management:
Common pests affecting brinjal include:
-
Aphids
-
Whiteflies
-
Flea beetles
-
Fruit and shoot borers
Use neem oil spray or insecticidal soap as an organic control. Crop rotation and interplanting with pest-repelling herbs like basil or marigold can also help.
Fungal diseases like powdery mildew or wilt can be managed by avoiding overhead watering and maintaining plant spacing.
8. Harvesting:
Brinjals are usually ready to harvest 60–80 days after transplanting. Harvest the fruits when they are glossy and firm but before the skin starts to dull. Use a sharp knife or pruning shears to cut the fruit, leaving a short stem attached.
Regular harvesting encourages the plant to produce more fruits.
Conclusion:
Growing brinjal in your home garden is a fulfilling experience that brings fresh, healthy vegetables straight to your plate. With proper care, sunlight, and a bit of patience, even small-space gardeners can enjoy a thriving brinjal harvest. Whether grilled, roasted, or curried, homegrown brinjal is sure to enhance your meals and gardening satisfaction.


.jpg)
.jpg)
.jpg)

0 Comments